Basics Of Portrait Drawing
In order to create a successful portrait drawing, there are certain basics you must understand. In this blog post, we'll discuss some of the key things you need to know in order to start sketching out portraits like a pro! So whether you're a beginner or an experienced artist, be sure to read on for some helpful tips from experienced portrait artists.
TO BEGIN…
Step 1: Choose your media
You can use a range of media for portrait drawing such as pencil, charcoal, pastel, pen, ink, felt-pen etc. Start by selecting your preferred media keeping in mind each will produce a different effect especially when coupled with the type of paper you use (ex. smooth, or rough-textured).
Step 2: Choose the type of portrait
Portraits convey the subject’s personality and unique qualities just as much as the artist’s skills and technique. According to Italian sculptor, portrait artist, and illustrator, Giovanni Civardi, there are two main types of portraits: formal and informal. In formal portraits, the subject’s pose “follows traditional patterns, and where a lot of attention is paid to composition, environment and the, at times symbolic, decor. Meanwhile, in informal portraits, the model’s pose is “spontaneous as he or she is captured in a casual pose or while carrying out some regular activity in a normal way.”
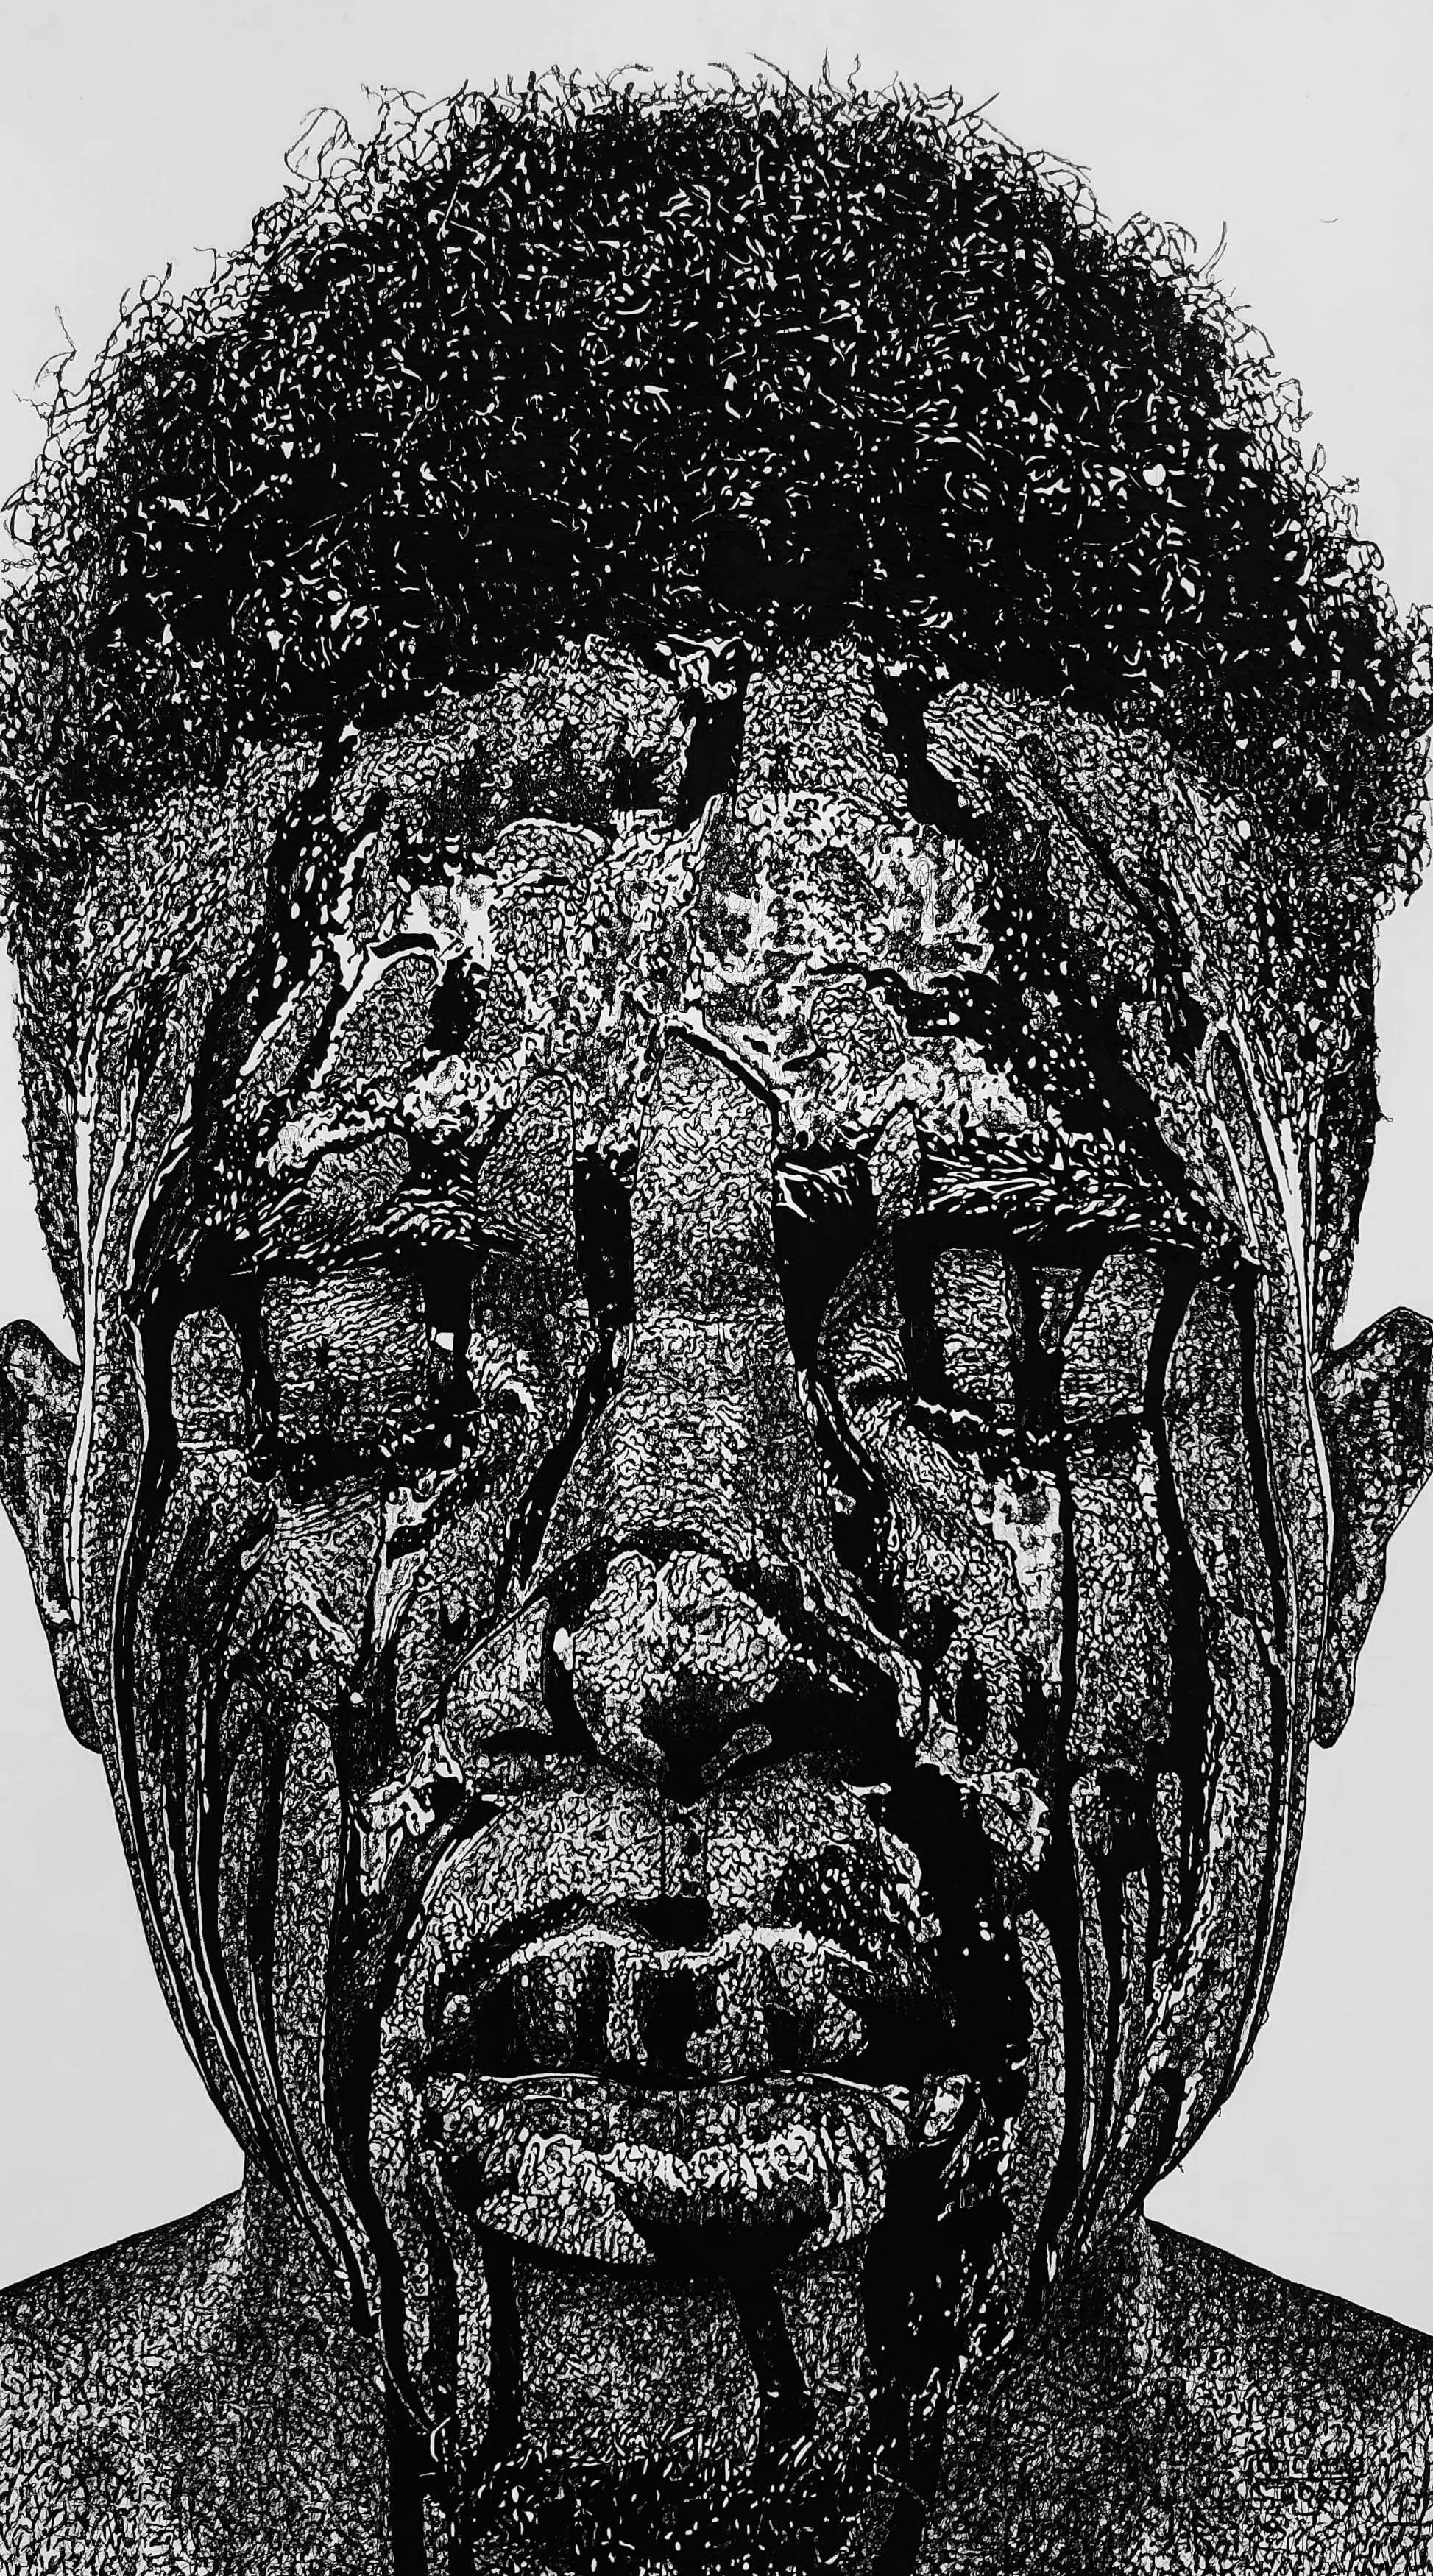
“Black Molasses” //Pen and Ink on Paper// by 2nd Place Winner in the 4th Edition, Kuruma Reid
HOW TO DRAW THE FACE
Step 1: Sketch an oval/ egg shape to represent the face
Sketch an oval or egg shape which will represent the face. Keep in mind that the height should be greater than the width. Civardi suggests that “in a portrait drawing, the dimensions of the face should not be more than two-thirds of the real face to avoid altering the proportions. You should use a maximum size of 40 x 50 cm (16 x 20 in) for the drawing surface when portraying just the head and 50 x 70 cm (20 x 27 1/2 in) for the whole figure. In a full-face portrait, make sure that the face is not at the very centre of the drawing surface but slightly higher and leaving more or less the same amount of space at the sides.” Another consideration is to watch out for the top of the head because you don’t want it to be too close to the edge of the paper. For three-quarter portraits, you want to leave sufficient room between the front of the face and the edge of the paper rather than at the back. Civardi also explains that when drawing profile portraits, you should leave a lot of space in front of the face and avoid cropping the head’s back profile or making it fit with the edge of the page.
Step 2: Divide the oval into lines
The lines you will be drawing represent the eye line, nose line, and mouth line. Halfway down the oval draw a horizontal line that will mark the eye line. The next line is the nose line (the base of the nose) which is located halfway in between the bottom of the oval and the eye line. Now the mouth line (the base of the bottom lip) falls halfway in between the nose line and the bottom of the oval.
Step 3: Measure the width of the head
When it comes to measuring the width of the head, we’d suggest following Idaho Art Classes technique of using “eye spaces” - “the head width is generally 5 eye spaces wide along the “eye line” which should be the widest part of our oval”. Drawing a centre line will also be helpful. They advise that using a ruler or your thumb and the pointed end of the pencil to measure and check each section is a good practice when making sure that the spaces are equal. Now this next tip is very important - always remember that eye spaces 2,3, and 4 are supposed to be the same width apart because these spaces represent the two eyes as well as the space between them. Taking into consideration that each person’s face can vary in terms of shape and size, eye spaces 1 and 5 do not have to remain constant on each subject. These 5 spaces are important because they help you to have accurate proportions and placement and measurement of the facial features.

“Ruby” //Charcoal// by 3rd Edition Finalist, Jennifer Globush
HOW TO DRAW THE EYES
Step 1: Draw the upper lid
The techniques for drawing the eye are from portrait artist, Jey Ram. He starts by drawing a steep incline followed by a flat line for the upper lid. Ensure that the corner of the two lines is slightly curved and organic.
Step 2. Draw the lower lid
Following Jey Ram’s technique, for the lower lid, you want to draw a curved line that starts at the top right side of the upper lid and curves downwards. This line will start to flatten out around the same height as the starting point of the previous line. You can connect these lines at the corner if you would like, I personally like how it looks when there is some space between the two.
Step 3. Semi-circle
Add a semi-circle under the upper lid and keep in mind the direction of the gaze or the direction that you want the eyes to be looking. For example, if the eyes are looking to the left, you want your semi-circle to be positioned more to the right of the eye.
Step 4. Eyelid Crease
Add a curved line above the first line we drew to add depth to the eye, this line shows where the eyes begin to protrude outward from the skull. This is why there tends to be a lot of shadow between this crease line and the brow line.
Step 5: Add highlights
Now you’re going to draw two small circles inside of the semi-circle that you previously drew. These will be the highlights of the eyes and you can experiment with the size and the shape of these circles. These circles will sit above where the pupil will be.
Step 6: Add shadows
Lightly shade in the semi-circle without filling in the highlights (two small circles you just drew). Jey explains that you shoulda void darkening your shadows too much because you want the pupil to be the darkest part of the eye.
Step 7: Draw in eyelashes
He states that “depending on how masculine or feminine you want the eyes to be, add eyelashes. For more masculine features you can just darken the top lid to indicate that there are small hairs or add in some small eyelashes if you would like”. Next, you’re going to accentuate the eyelashes by adding more curved lines and by darkening the upper lid line for a nice definition.
Step 8: Draw the pupil
As we previously noted, the pupil will be the darkest area of the eye in your drawing. To achieve this, draw a circle within the semi-circle and darken it to create a nice contrast between the shadows, and highlights.
Step 9: Shading
Jey finishes his process by adding some shading right underneath the top lid to create more depth and the illusion of casting shadows from the eyelashes and top lid. He also adds some small shading lines around the eye to give the drawing more life.

“Born By The River” //Pen and Ink on Paper// by 2nd Place Winner in the 4th Edition, Kuruma Reid
HOW TO DRAW THE NOSE
Step 1: On the nose line, draw a sphere
This sphere can vary in size depending on how big you want the nose to be. Jay explains in his guide to drawing the nose that it’s best to think of this shape as a sphere instead of just a circle in order to develop your understanding in 3 dimensions. Using the basic forms as your pillars or building blocks is a good place to start and will pay off tremendously he states.
Step 2: Draw the underside of the nose
It’s important to note that if you’re drawing the nose at an angle, you will be able to see its underside and the nostrils. To draw this, Jey Ram suggests adding a curving line about 2/3rds of the way down that starts up on the left, comes down to where the center of the nose will be (the tip of the nose) then curving back up before coming back down at a steep angle. This will add dimension to the nose. In his guide, he has an example image to help you visualize this line.
Step 3. Draw the side plane
Jey Ram advises drawing a line going up to the right from the right top corner of the line in the previous step. This should define the form of the nose As you can see, the nose can be broken up into smaller parts that compose it's form - the sphere with a top plane, a rounded bottom plane (or two flat planes connected at the center) & a side plane. We love this pro tip he provides: “when you learn to draw anything new, consider how you can simplify down as much as possible before adding complexity, this will drastically increase the pace of your learning.”
Step 4. Draw the nostrils
Now for the nostrils. Jey explains that, in his process, when drawing the nostrils visualize a large curving line that goes over the top, and a reversed curving line that is small and connects to the larger line. You want to keep the nostrils small and avoid using too many lines.
Step 5. Refine the nose
In his final step, Jay describes that he rounds out some of the corners and darken lines as he sees fit and even erase lines and redraw them if need be. As a part of his practice, he writes notes beside my drawings on what I did wrong or can improve on so that his drawing can be stronger and more accurate with more practice. We’d advise that you get in the habit of constantly sketching when you’re now starting out with portrait drawings because the practice will help you increase the accuracy and likeness.

“Denis” //Charcoal// by 3rd Edition Finalist, Jennifer Globush
HOW TO DRAW THE lips
Step 1: Top lip
Once again following renowned portrait artist, Jey Ram’s easy to follow illustrated guides on drawing facial features, when it comes to drawing the lips he begins by drawing the top of the lip using a small curve. Starting at this point allows him to have accurate placement of the lips in relation to the nose. He does note though that if you are drawing lips on their own, you may opt to start from the center-line that segments the top and bottom lips. You can work with your personal preference. He then draws a line declining from the corners of the center region to complete the top lip.
Step 2: It’s time to draw the center of the lip, by adding a small curved line towards the center.
Step 3: For the bottom lip, you simply need to draw an upward curving line.
HOW TO DRAW THE EARS
Step 1: Outer shape of the ear
Jey Ram’s technique for drawing ears starts by drawing the outer shape of the ear. He notes that you should pay attention to how the ear usually appears - i.e. take into consideration that it’s wider towards the top half and then get thinner towards the bottom. You can use a reference image for practice and progressively incorporate drawing from memory.
Step 2: Rim of the ear
Draw in the details of the rim of the ear. In his visual example in his guide, you’ll notice that on the left side the line curves in towards the middle.
Step 3. Add the hole of the ear using two curved lines that meet at a point
Step 4. Next, Ram draws in the shape of the basin area of the lower part of the ear. He explains that it’s expected to curve behind the rim that you drew in step 2 and curve around to connect with the bottom of the curve of the previous step. Towards the top of the ear, you will see this ‘Y’ shape that is created by a semi-circle towards the top left. These lines vary a lot depending on the ear, Ram recommends studying a variety of ears to help you understand the overall shapes.
Step 5. Add in shading, pay attention to where the darks are and use the coloured contour lines to help you see how the forms fold over one another.
CONCLUSION
We hope that under the guidance of Jey Ram’s and Giovanni Civardi’s tips and techniques, you will enjoy the beautiful process of rendering portraits and find their tips informative and insightful. Good luck with your drawing endeavours and happy creating!