How To Create A Powerful Artist Statement
When you're an artist, the first thing people ask about is your work. But what do you say when they want to know more? How do you write a statement that describes who you are and what your art is all about? You've come to the right place! Creating a great artist statement for your work is an important part of being a successful artist. This blog post will walk you through the steps to write one, with some helpful tips along the way!

“Unfurling” //Oil on Canvas// by 4th Edition Finalist, Anne-Marie Zanetti
What is an Artist Statement?
Firstly, let’s understand what exactly is an artist statement. It’s a few sentences that basically describe what you create and why you create it. It helps your audience to better understand you as an artist.
Typically, you will be asked to submit one when applying for residencies, grants, and exhibitions and you can include it in the about section of your website.
You might ask, but what’s the difference between an artist statement and an artist bio - here’s how they’re different. An artist bio summarizes the lead up of significant events and top achievements for your career as an artist. It’s basically about you and who you are as an artist, whereas an artist statement is primarily about your current art, its meaning and intent and can act as an intro to spark intrigue for your audience to view your work.

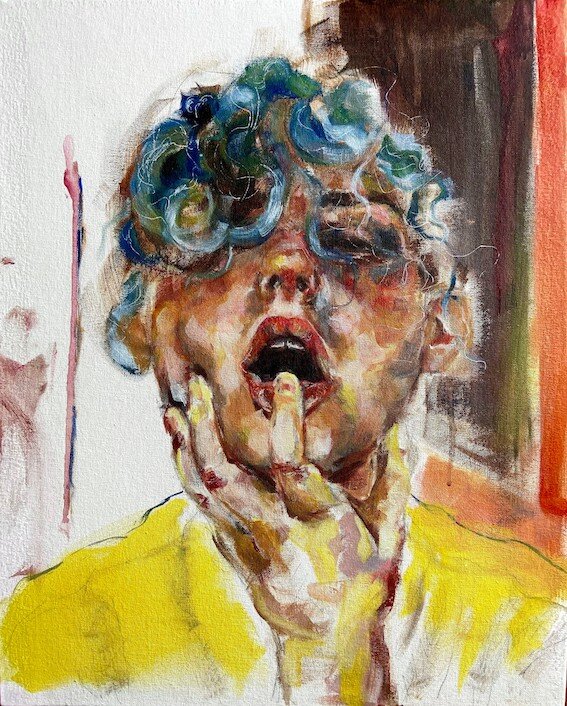
“Gloriana” //Oil on Panel// by 3rd Edition Finalist, Lesley Thiel
Step-by-Step Guide To Creating A Powerful Artist Statement
Step 1: Brainstorm
Time to get those wheels turning and start by brainstorming. This technique is one of the best ways to create ideas in a relaxed, non-judgmental environment which in turn can enrich the ideas you come up with. Creating a mind map (a diagram that visually maps out interconnections and relationships between categories) is helpful when it comes to brainstorming. It’s good to use “why”, “what” and “how” as your central themes for your mind map.
”Why” will explore your work’s intent, symbols and influences. When delving into the “why” aspect of your art, avoid terms such as “try” or “attempt” because it doesn’t add anything to your statement and has the implicit meaning that suggests it might not accomplish your intentions. The key is to be confident!
“What”, when it comes to your artist statement, refers to the medium you work in, for example, painting, photography, sculpture, etc., as well as your subject matter. It also communicates what your art does. For example, in renowned artist, Mark Rothko’s artist statement, he clearly sets the parameters of his work by stating what it does and what it doesn’t do - “I’m not interested in relationships of color or form or anything else. I’m interested only in expressing basic human emotions – tragedy, ecstasy, doom”.
”How” makes reference to how you create your art i.e. your process, technique, and materials or tools integral to the process.
It’s helpful to have a digital portfolio of your art by your side for reference so you can examine the why’s what’s and how’s of it effectively.
Equally, these three questions are the basis of the content for your statement. Now that you have the foundation, it’s time to make it sound powerful!
Step 2: Establish your tone
Your chosen tone should replicate natural language i.e. how you actually speak. Doing this will not only show your personality but be much easier for the reader to understand and relate to you as an artist because it sounds like you’re speaking to them directly. There are a variety of tones to explore that are also ideal and memorable for an artist statement such as conversational, professional, assertive, animated, confident, and many others. According to Grammarly, an online grammar, spell-checking, and plagiarism tool, “As you write, it’s easy to shift tones unconsciously”. Making use of grammar checking tools such as Grammarly can also help in the process of establishing tone because they have a built-in tone detector that “analyzes each sentence’s word choice, phrasing, punctuation, and capitalization to identify its tone. It then offers tone suggestions so that you can easily make adjustments and feel confident that your readers will react the way you expect them to. Besides helping you strike the tone you intend, Grammarly’s suggestions make your writing clearer and your word choice more engaging, so your writing is polished and professional.” The best part is that you can add it to Chrome for free!
You should aslo keep your audience in mind when selecting the right tone and whichever tone you decide on, you can couple it with a secondary informative tone because the purpose of your artist statement is to inform. Lastly, always keep your tone authentic because it makes you and how you present your art unique.
Step 3: Avoid using art jargon
You don’t have to include extremely technical terms in your artist statement because you want it to be understandable for people in the art world but also people who don’t know anything about art. Remember that the goal is to effectively transmit your message about your work. Keeping it simple means that it’s easier for everyone to follow and you’ll most likely get positive feedback for this and more people interested in engaging with your statement because they can’t connect with it if they don’t understand it!

“Anne” //Oil on Panel// by 3rd Edition Submitter, Zully Mejia
Step 4: Write in the first person and use the active voice
You should write your artist statement in first person because the reader is most interested in your point of view and it’s a better way to form a bond between reader and artist. Who knows your work better than you? Your voice is the most credible and trustworthy when it comes to reporting and describing your work. Many state that third person (used in your artist bio for example) sounds more professional but the reason why it’s not appropriate is that it’s not as direct or personal and doesn’t allow for that essential connection between reader and artist. Continually, along with first-person, you should use the active voice (a sentence in which the subject is the person or thing carrying out the action). An example of an active sentence is “Chantal Boynes founded the Boynes Emerging Artist Award”. Using the active voice will make the idea clearer for the reader and ensures that the sentences remain concise and uncomplicated.
Step 5: Keep it concise
150-200 words is a great length for your artist statement. You don’t want it to be too long nor too short because the purpose is to engage and inform the audience, not to distract or bore them. If you keep it within this range it will also show that you have a good written command because you can present your ideas in a concise manner.
Step 6: Avoid clichés
At all costs, you want to avoid using clichés such as "my artwork speaks for itself" or vague language because they don’t say much, won’t add to your statement and won’t reflect your creativity. You’re an artist so by nature you’re a creative being. Use that creativity to actually make an impact with your uniqueness. Here’s where a thesaurus will come in handy so that you can find lots of captivating synonyms to describe your work. For example, instead of using a worn-out phrase such as “I’m interested in…”, opt for “… piqued my curiosity/ fascination” or if you want to say “my work examines…”, try making it sound more exciting by using synonyms such as “delves deeper into” or “questions”. One thing to note is that you need to make sure your word choice is in line with the tone that you’ve chosen.
“Yellowing” by 1st Edition Finalist, Cassandra Carrasco
Step 7: Make sure it’s up to date
This step goes for if you already have an artist statement or if you are creating one for the first time, make sure to always update it because your work can evolve or you may still be experimenting so you need to account for this when you write or edit your statement. It’s good to update it every time you redirect your work and explore or incorporate new things.
Step 8: Cater for different opportunities
There may be times when you need to change the tone of your statement so that it will be received better by your audience or you may have to write a longer statement to fit certain criteria in an application. Whatever the opportunity may be, it is helpful and will save you time if you write different versions of the same artist statement for different opportunities.
Step 9: Formatting
Lastly, we’ve reached the formatting stage. The standard format which is acceptable for your statement is a simple font such as Times New Roman, Arial, or Calibri with a size that’s neither too large nor too small. For times New Roman a good size is 12-point and the equivalent in Arial and Calibri is 11-point.
Furthermore, you can save the document as both a PDF and a Word Doc. When sending your artist statement via email, it’s easier for the recipient to have it stored as a Word Doc because they can copy, paste and insert it elsewhere with ease if need be. You want to always have your recipient in mind especially if you’re submitting this statement in an application for a residency, exhibition opportunity or art competition, because they will most likely receive many entries alongside yours and being considerate toward their process of transferring and viewing your artist statement, will be greatly appreciated. For this reason, it’s also beneficial for you to name your artist statement document as follows or a variation of it: First Name_Last Name_artist statement_ Year and remember that you can include your name, mailing address, phone number, and email at the top of the document.
In conclusion, a powerful artist statement is a great way to introduce yourself and your work. It's the first thing people see when they look at your portfolio, so it needs to be engaging enough that people want to learn more about you and what you do. With the help of these tips and steps, you’re well on your way to creating a powerful artist statement that’s just as impactful as your art, so get your pen ready and have fun expressing yourself and your work!