The Beginner’s Guide To Drawing Facial Features
The human face is a complex and beautiful thing. Drawing its features can be challenging at first, but it’s not impossible! In this blog post, we’ll teach you some great tips from a few leading names in the art world for drawing facial features that will make your work come alive and capture the uniqueness and beauty of any face.

“Jerrett” //Graphite & Charcoal on Paper// by 3rd Edition Finalist, Jennifer Globush
Start by examining the face shape
Understanding the shape of your subject’s face will help you create proportions that are both accurate and appealing. There are 7 common face shapes - oblong, diamond, square, heart, triangle, oval and round. According to Byrdie, an online platform focused on everything beauty, “to determine… face shape, you’ll want to examine three criteria: the widest part of the face (forehead, cheeks, jaw), the jawline (round, square, pointy) and the length of the face (short or long).” Face shape isn’t only significant in the beauty world, but also in the world of art because portraiture should account for all the different face shapes.
2. Draw a circle with two intersectional lines inside
One line will be vertical and placed in the middle of the circle; the other should be horizontal in the middle of the circle. This horizontal line will be the brow line later on. It’s best to keep the lines somewhat faint for now so that they can be erased with ease later on. They should meet at the centre point and form a cross. The circle that you have just drawn is the upper portion of the entire head. This step will help with understanding proportions and placement of the facial features.
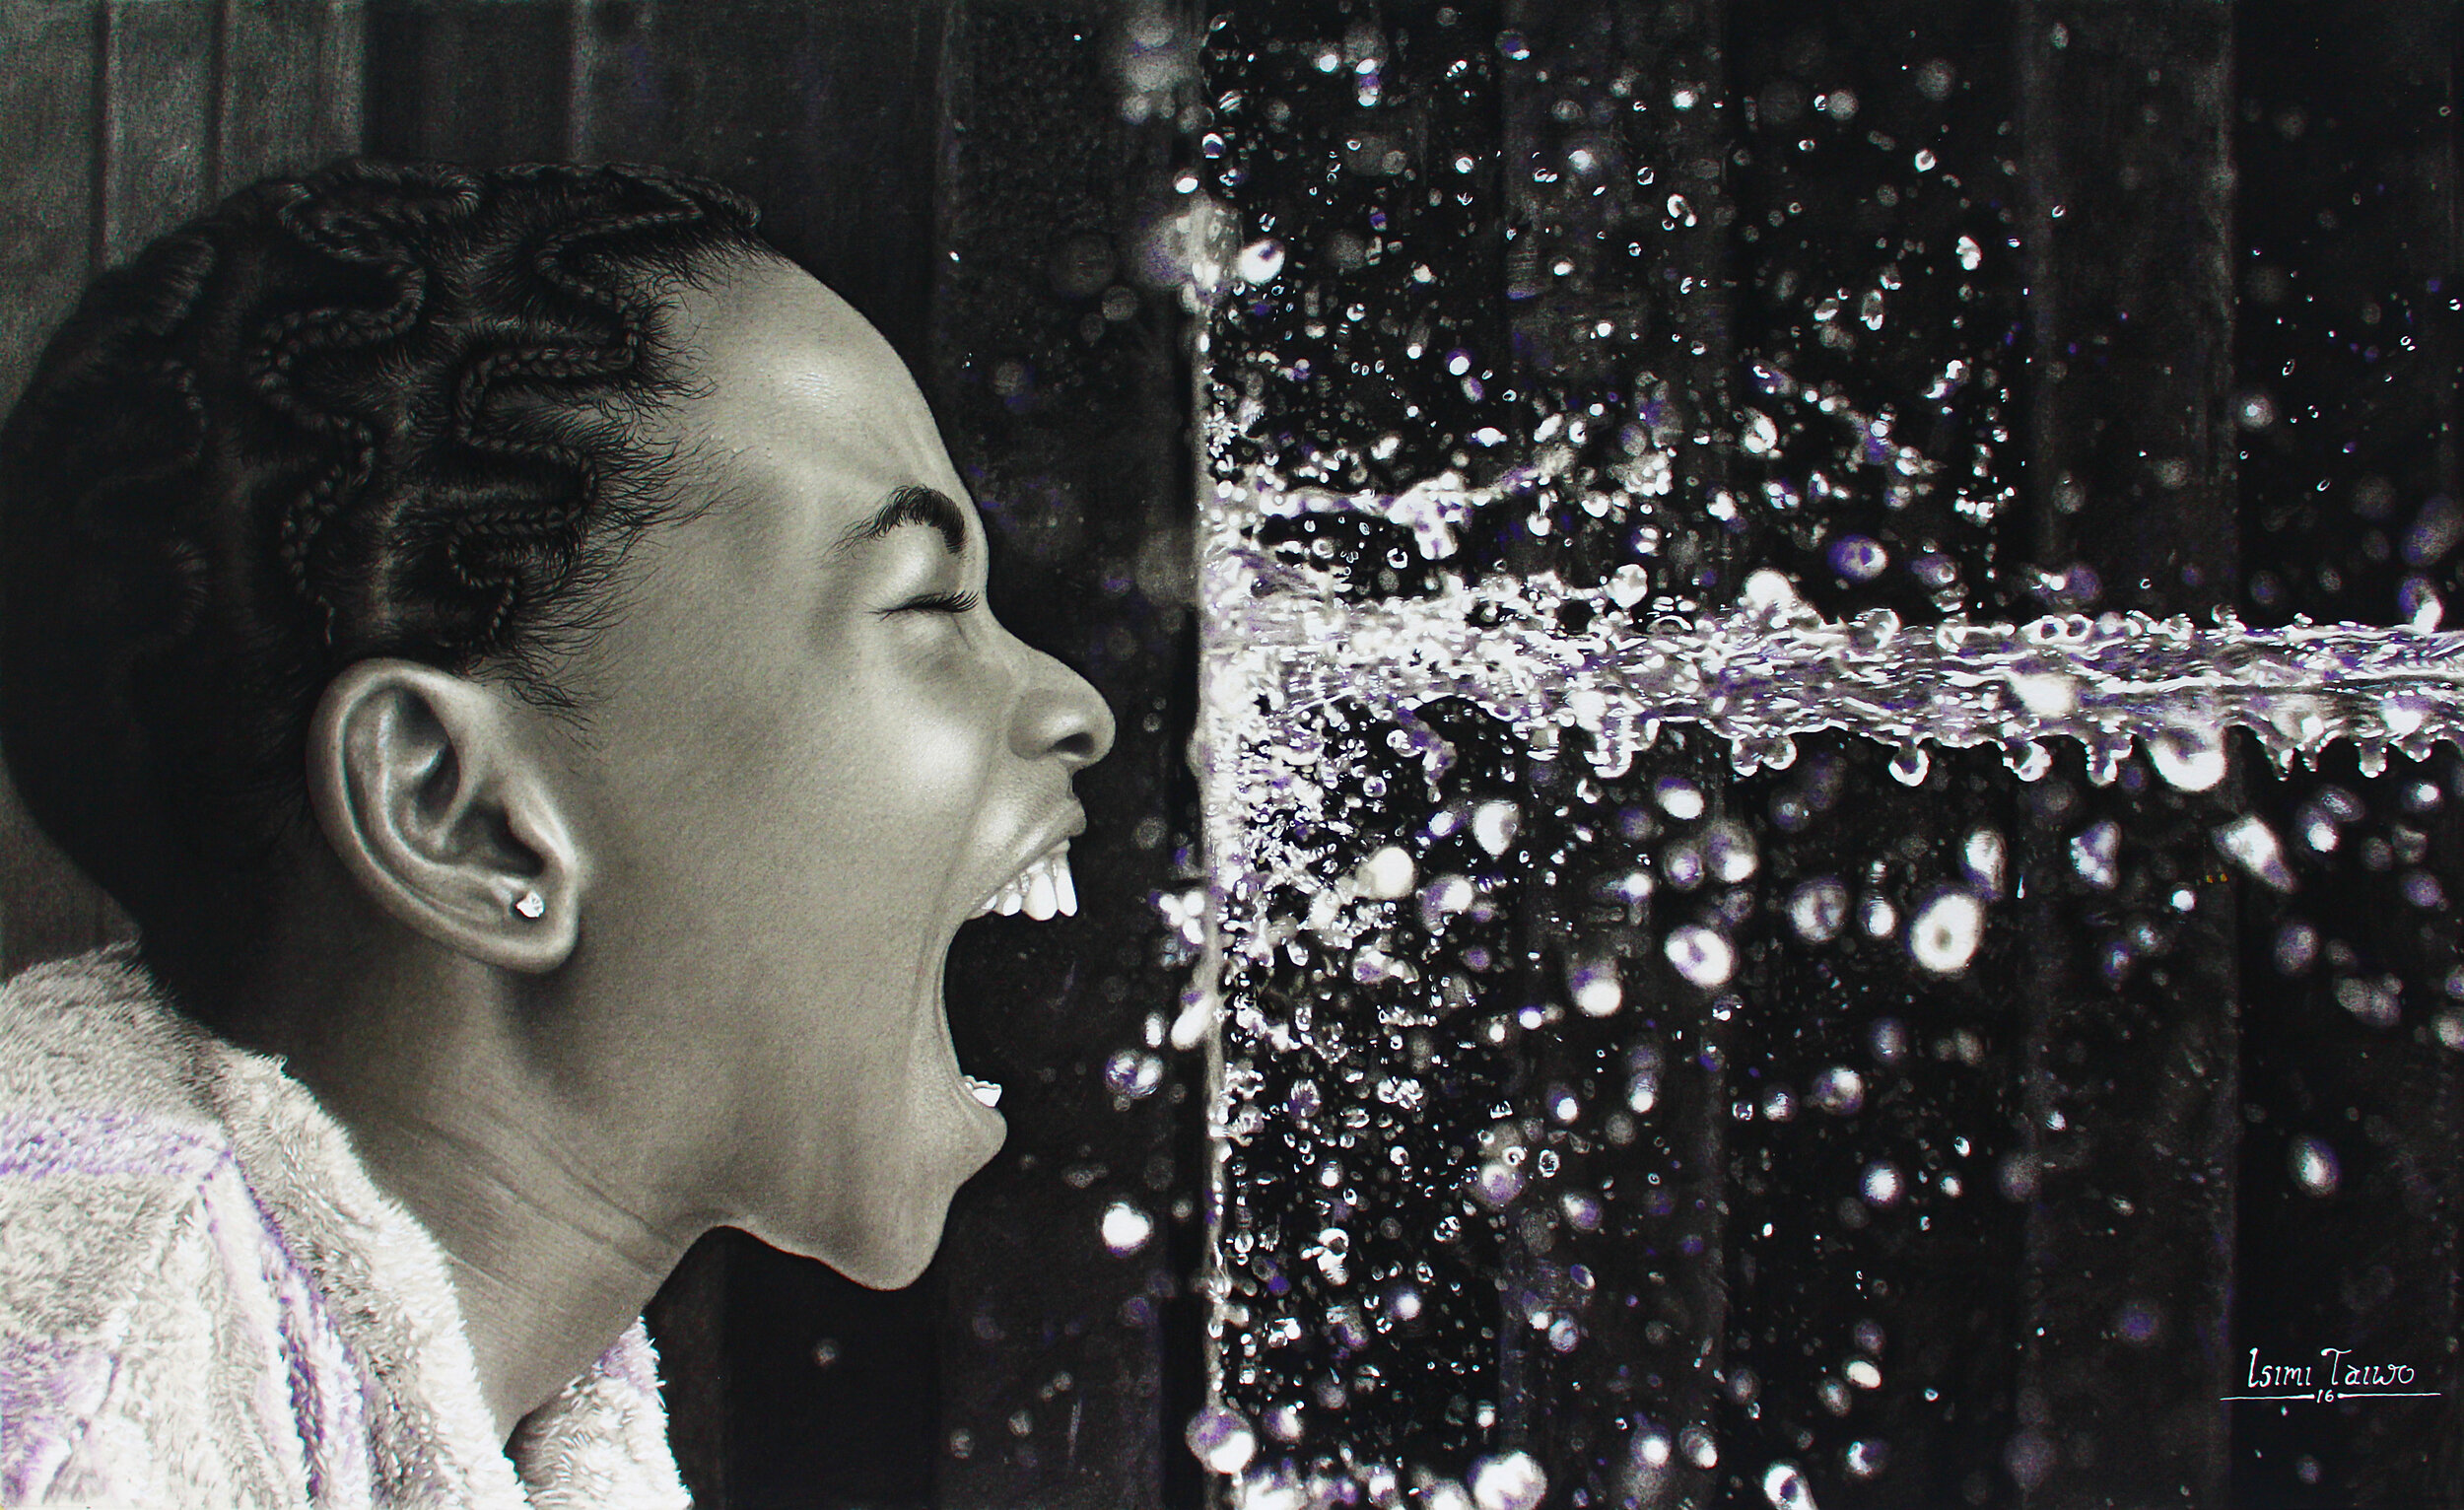
“Facing Fears” //Graphite, Charcoal & Pastel on Paper// by 4th Edition Finalist, Taiwo Isimi
3. Inside the circle, draw a square
The square is a geometrical foundation for the sides of the face. The key here is that each corner of the square touches a point in the circle. The top line of the square, later on, will be the hairline and the bottom line will be the nose line.
4. Drawing the chin
To draw the chin, start by measuring the distance from the centreline to the bottom line. You can use your pencil and ruler for this step. From halfway across each side of our square face (the vertical lines), draw two intersecting diagonal marks that come down towards where it meets with the horizontal edge at about head height. This will give you an almost perfect right angle in which to calculate how far back they connect - this is called 'chord'. If you don't have any measuring tools on hand, take out some string and hold it taut between finger-tips stretched apart by their widths while holding both ends up so as to form a cross shape; mark off 2 fingers' worth for every 1 inch along.

“Born By The River” //Pen and Ink on Paper// by 2nd Place Winner in the 4th Edition, Kuruma Reid
5. Drawing the eyes
Now, we'll map the important features of our subject. More specifically, the eyes! It's easy to find where they are on a face if you know how tall their head is and what size it is in proportion to other things. The eyes are generally found on a line in the center of one's forehead and should correspond with this imaginary point.
Another important measurement to keep in mind is the width of the eye. According to Matt Fussell from The Virtual Instructor, for an accurately proportionally drawing, “the width of the head, from ear to ear, generally measures the same length of five "eyes".”
Now that we know where our eyes are located on the face, it’s time to draw them. Drawing realistic eyes can be difficult, so here's how to do it! First start by drawing two circles on top of one another. The bottom circle should be slightly bigger than the upper one and both should have a slight upward tilt at each end. Next draw an oval shape around them with shading that falls into these same curves as well as out of them for more depth (this will also help make your eye look like they are looking in different directions). Now you need some highlights- use white paint or pencils if necessary to bring those features forward onto the surface layer from behind this new front face where all light is shining through now because we've added enough soft shadows earlier such that there isn't any glare coming off what you want.
6. Drawing the lips
Decide on the direction of the light source so that your shading can be accurate. You can shade both top and bottom lips and create a darker shadow under the bottom lip. Darlene Nguyen from Rapid Fine Art has a great guide to drawing realistic lips. She starts by drawing a long isosceles triangle with a straight horizontal line in the middle. She notes that “the longer the horizontal line, the wider the lips will be. The shorter the line, the plumper they will be.” Next, she draws a bow (like in a bow and arrow) as her reference for the top lip and Cupid bow. For the bottom lip, she draws a curved line that shouldn’t pass the triangle’s base. The horizontal line acts as a guide for her to complete the mouth’s opening.
When it comes to shadows and highlights, According to Nguyen, if the light source is emanating from the upper right, the shadow under the bottom lip starts to fade on the right side. She further suggests that to create lip wrinkles, a 0.5mm HB pencil is a go-to followed by a blending stump to “smooth out the shading on the bottom lip.” Avoid over blending because you don’t want the lip wrinkles to disappear. She explains that you can create the glare effect by “going over the lighter areas with the pointed end of a kneaded eraser and clean up the highlights”. Nguyen further explains that “using a 6b pencil, darken the shadows in areas such as the outer edges of the lips, under the bottom lip, the wrinkles and the corners of the lips. You can change the size of the lips by moving the horizontal line up (to make the upper lip thin) or down (to make the upper lip thicker). Also, adding more glare will make the lips look even plumper.”
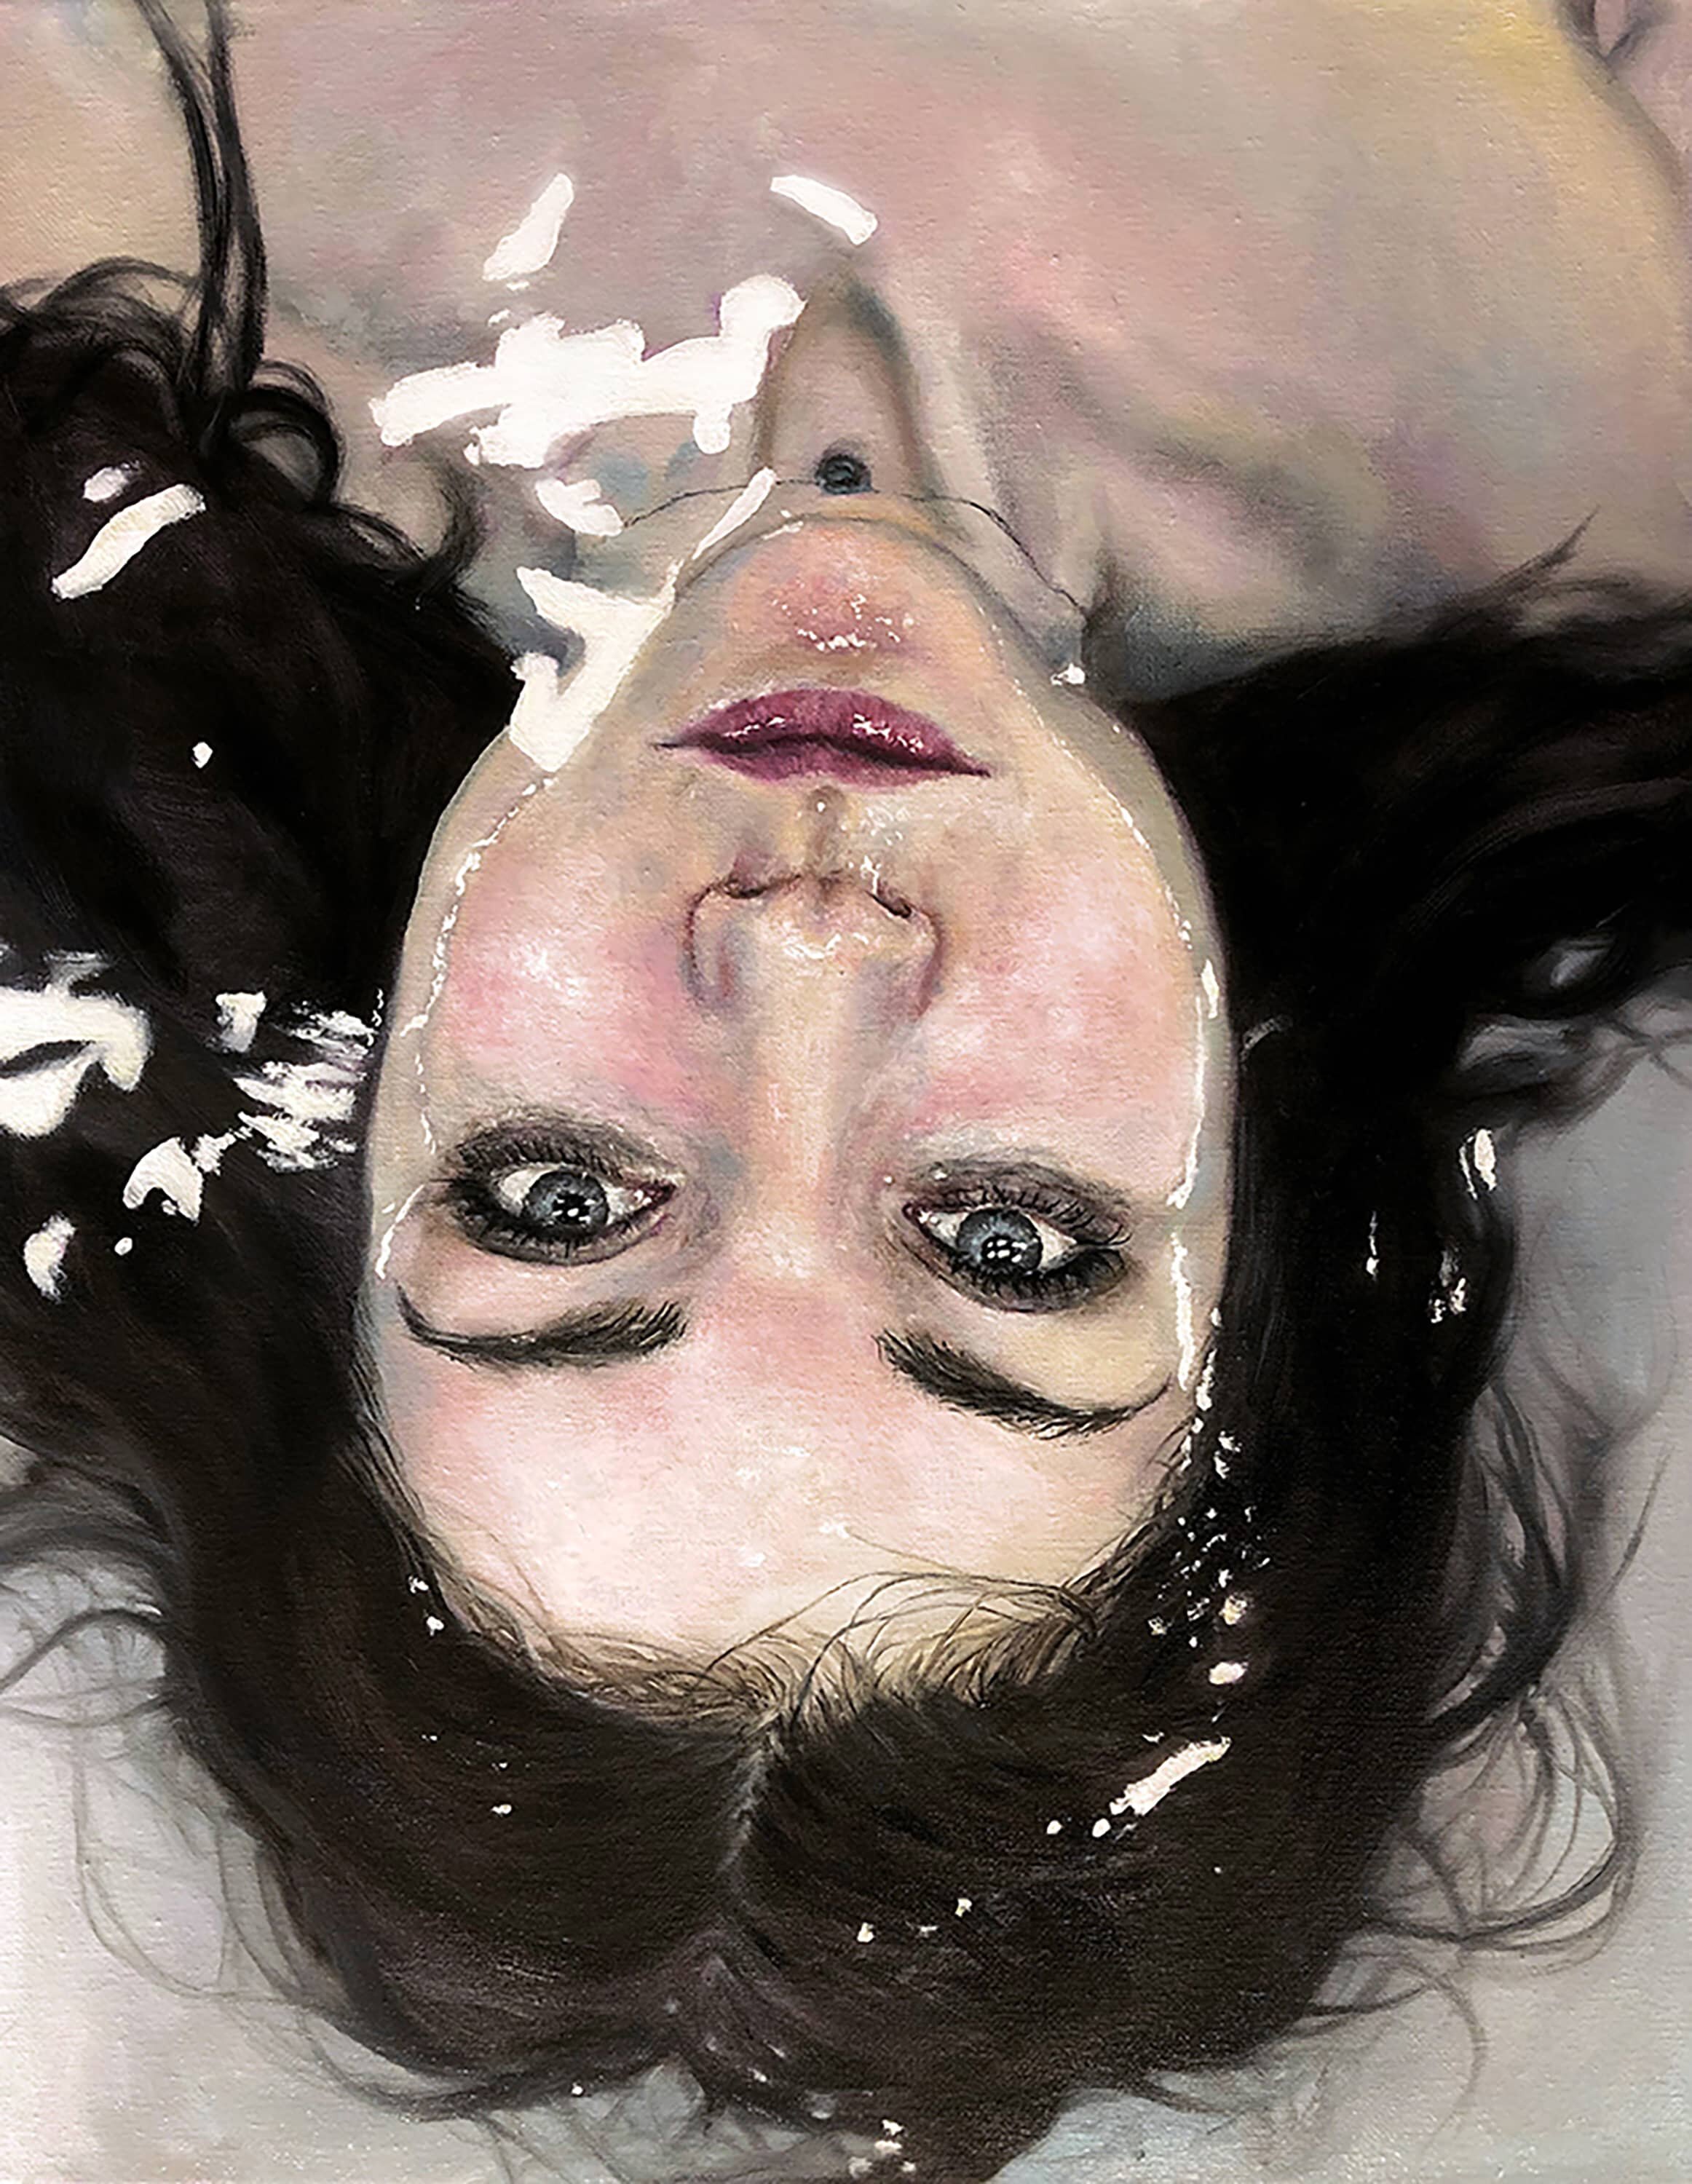
“Lukewarm” //Oil on Canvas// by 2nd Edition Submitter, Leah Probst
7. Drawing the nose
Arteza’s guide to drawing a nose is really helpful. They start by drawing a vertical line to ensure the symmetry of the nose. Then, draw a circle at the base. Next, you’re going to draw two overlapping circles on either side of the first. Amelia Rose from Arteza explains that “later on, these will become the end or ball of the nose and the wings that flare out and encompass the nostrils.” She then draws a trapezoid to represent the bridge of the nose. Her second step involves adding lines on the sides of the bridge to remind account for the fact that it splays. She states that these lines also came in handy when She starts adding hatching (the technique of drawing lines extremely close together to make an area appear darker). Rose explains that she uses the nose bridge as a guide in order to connect all the lines following which she adds the nostrils. The nostrils are the point with the least amount of light along with under the tip and the sides of the nose. She notes that before continuing to add shadows, she erases all the initial construction lines. She explains that she ends the process by gradually building the shades from dark to light - “Now that I placed the darkest areas, I continued with halftones, working around the ridgeline, the tip, and nostrils. For the lightest areas, I used an eraser and removed the graphite on the ridge, the ball of the nose, and the wings until a bit of white paper was revealed.”
8. Drawing ears
When it comes to drawing ears, Darlene Nguyen advises that when outlining the shape of the ear, remember that the ear lobe has to be smaller in proportion to the helix. Next, you’re going to focus on replicating the bumps and folds of the ear. To do this, Nguyen suggests to draw two curves that represent the main folds of the ear - “the first curve should line the middle to top part of the ear. You can make this curve as smooth or jagged as you want. Remember to leave a small amount of room around the edge. The left side of the curve should slightly curve into the centre of the ear.” The second curve, she explains, will ressemble a tear drop at the bottom and it is wrapped up to form the flap ie. the tragus. Like witht he lips, you need to determine the direction of your light source. She uses a 4B pencil to shade the darkest areas and uses a HB pencil for midtones and lightones where the bumps are darkest and the valleys are the lightest. Finally, she uses a blending stump and a kneaded eraser to highlight the lighter areas of the ear.
Conclusion
Drawing faces is a skill that takes time and patience to perfect. In this blog post, we’ve provided the tools you need to get started drawing facial features, as well as some tips on how to improve your skills later down the road. If you want even more help after reading our guide, be sure to tag us in any of your sketches or paintings so other artists can offer feedback! We love seeing what others come up with when they take their own perspective on portraiture.