How To Draw Birds: Tips & Techniques
What the best way to learn how to draw birds? I’m glad you asked! Birds are a favourite subject for many artists. Maybe you find them beautiful, or maybe they symbolize your freedom and happiness. Whatever the reason may be, it’s always easier to draw them when you know what techniques work best! This blog post will give you some helpful tips and tricks so that drawing birds can be enjoyable and less daunting.
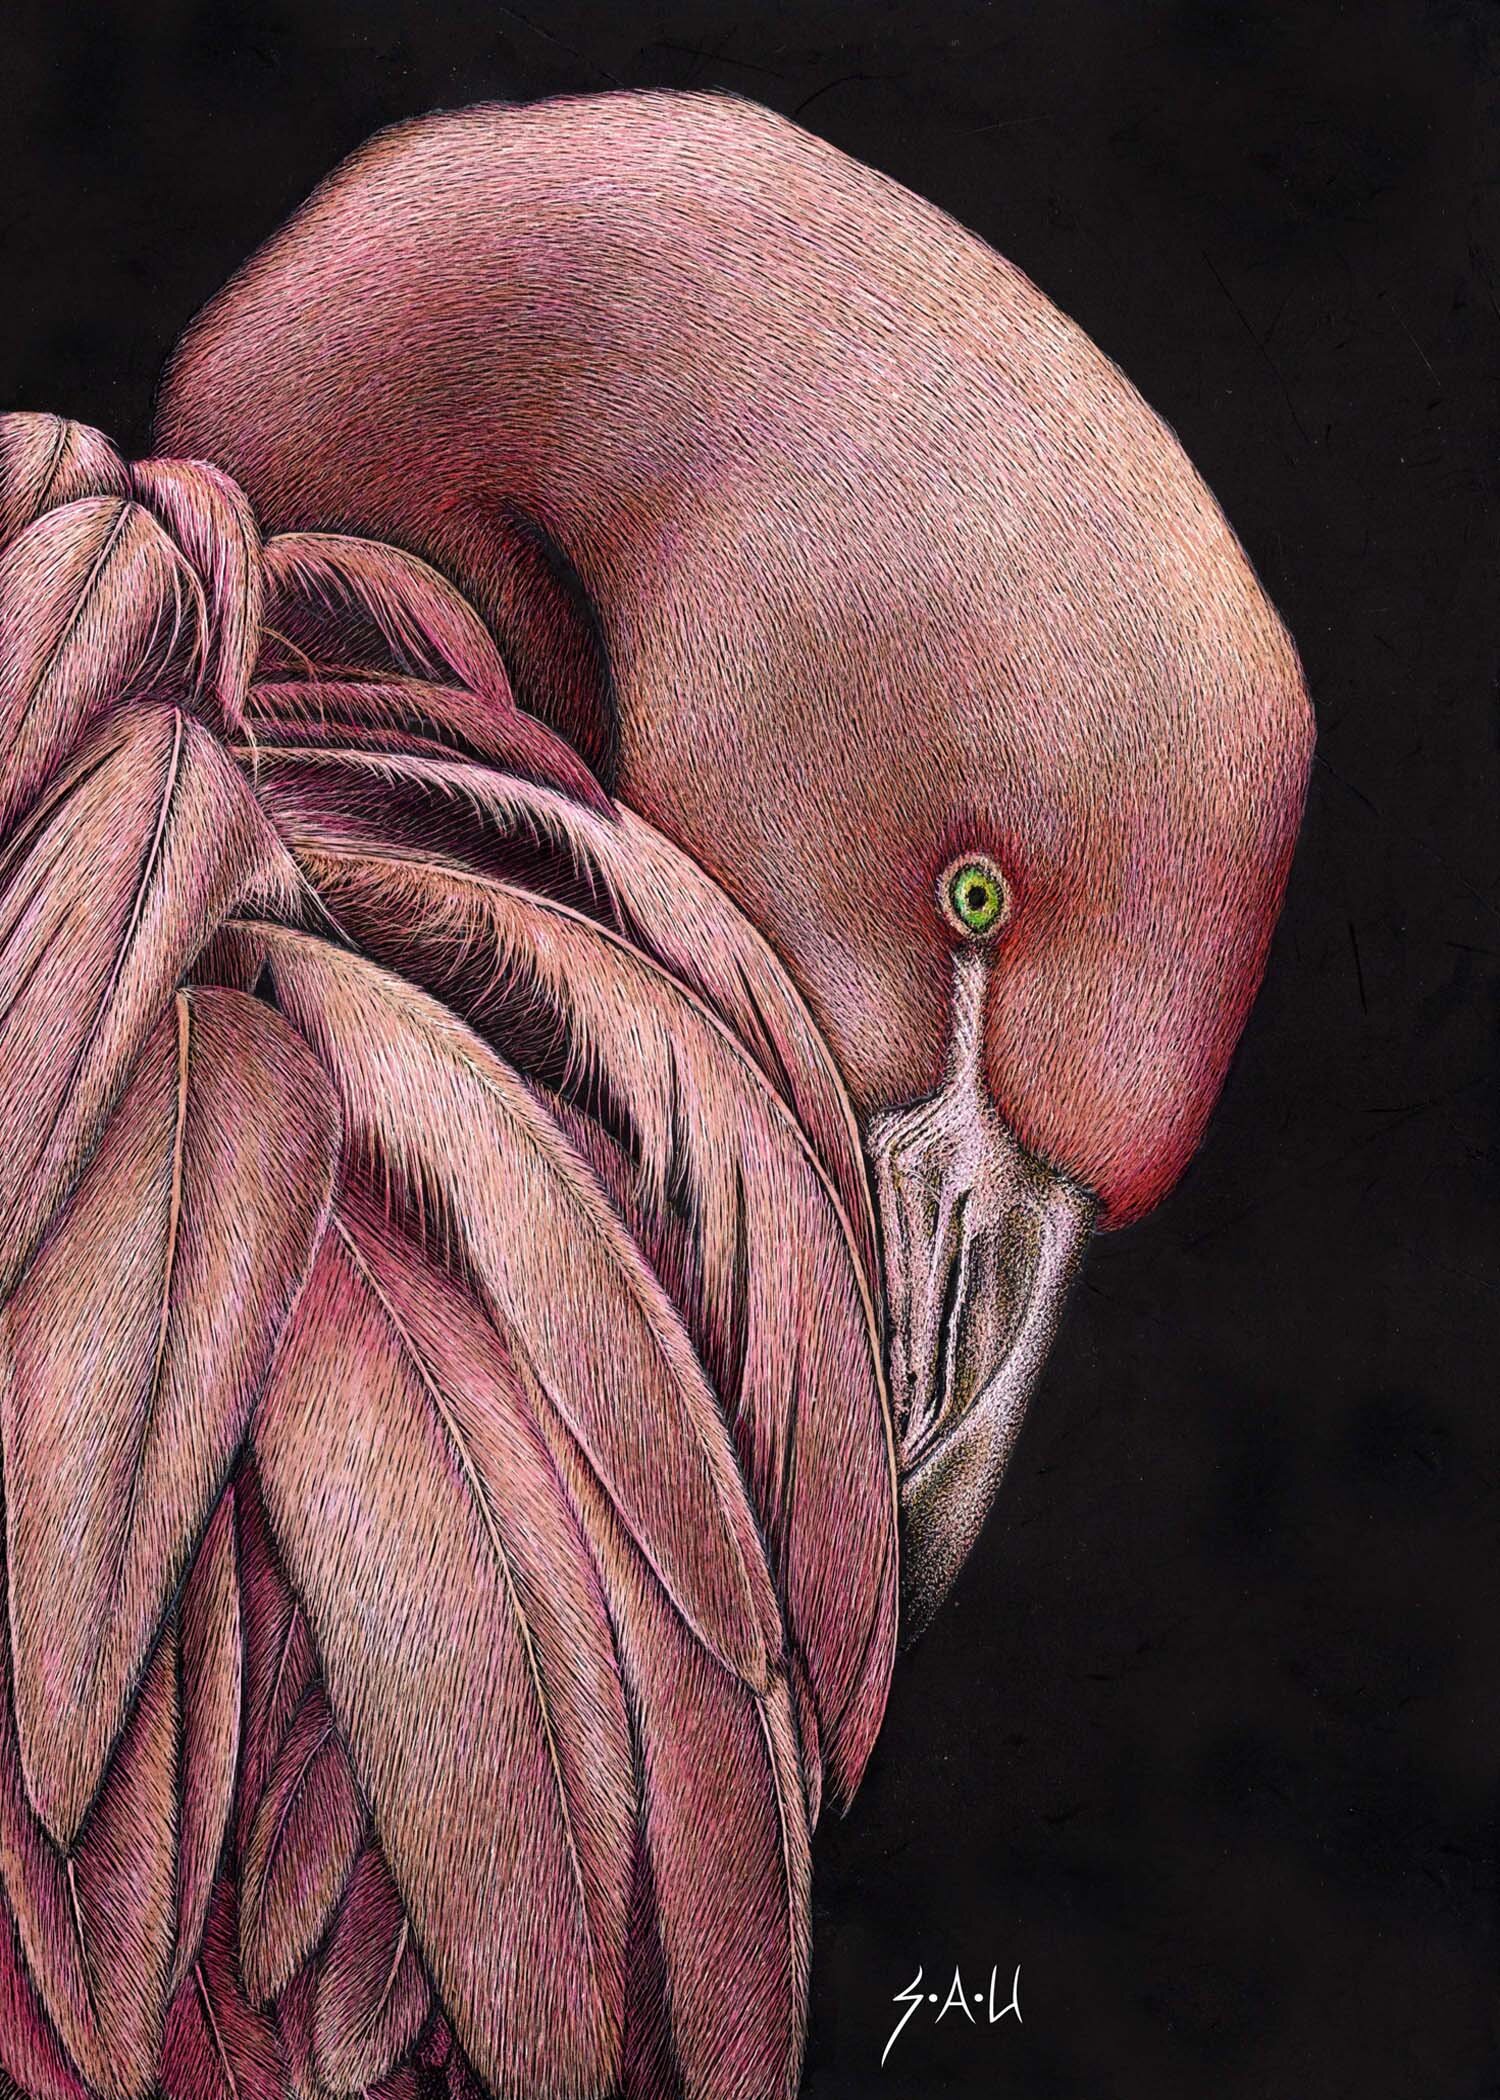
“Pretty in Pink” //Colour pencil and scratch board// by 2nd Edition Submitter, Sheryl Unwin
research the anatomy of birds
If you want your drawings of birds to be realistic and accurate, first take some time to research what they look like on an anatomical level. All birds have a basic skeletal structure yet different bird species vary in terms of their size and shape. Nevertheless, their basic physiological components include the head, bill, chin, throat, neck, back, chest, abdomen, flanks, wings, rump, tail, under tail coverts, legs, and feet which each impact the motions or individual jizz as bird artists often call it as well as the form of birds. Ornithology, a blog site dedicated to exploring the science of birds, has an informative and clearly labeled external anatomy of birds which will be helpful for understanding their composition.
According to Dr. Natalia Balo, contemporary figurative artist and author, and illustrator of Bird Anatomy for Artists, “there are three main shape-creating factors that influence the visual appearance of a bird - the position of the bird in space in relation to the viewer, the internal structures shaping the body from within, and the movements and actions of the body… Knowledge of bird anatomy greatly increases the bird artist’s powers of observation, making it possible to comprehend the variety of relationships between the visual components” which in turn will transfer into your drawing. With regards to the position of the bird in space in relation to the viewer, to have the best grasp for spatial mannerisms of the bird, you should practice drawing the bird in the same position or pose multiple times, each with a different viewpoint. You’ll notice that the volume of the bird’s body will be consistent but the appearance will change in relation to the spatial distance between artist and subject. This is because the linear perspective changes on each occasion. The bird’s structure will always be symmetrical because there’s a clear central axis.

“Intent” (In progress 1) //Pastel on Paper// by 4th Edition Finalist, Ranjit Sagoo
2. Photo-reference or live birds
The second step is to decide whether you want to use images as reference points for your drawing or if you want to go out in nature and take inspiration from live birds. 4th Edition Finalist, Ranjit Sagoo explains in his interview with Founder of Boynes Emerging Artist Award, Chantal Boynes that when he’s drawing birds he never uses a single reference photo but uses multiple pictures to create his final image. This is more beneficial because you will be able to get a better feel for the different angles, positions and movements of the bird in focus that will culminate to your final piece.
Meanwhile, if you opt to draw live birds, you can start by practicing drawing captive or tamed birds (i.e. birds in cages, in zoos, bird sanctuaries, aviaries, ponds etc.) because their movements are restricted meaning that they shouldn’t be as unpredictable. Equally, the Freeze-Frame technique can come in handy when drawing live birds because it allows your mind to take a quick mental snapshot of the general composition and pose of the bird that you can use for reference, plus, it doesn’t have to be a detailed visual memory because your main focus at this point is form, size, colouration, environment and gesture.

“Intent” (In progress 2) //Pastel on Paper// by 4th Edition Finalist, Ranjit Sagoo
3. SKETCH OFTEN
Sketching often is so important when it comes to progressing in drawing accurate and realistic depictions of birds because it’s a great way of improving hand-eye coordination and muscle memory which are imperative. According to Dr. Natalia Balo, “sketching is not just a preliminary exercise. Making sketches regularly is not only a good working practice while studying bird construction, but also aids the creative experience of drawing and painting birds. The most successful bird artists sketch birds regularly. Most importantly, the visual records accumulated in fieldwork are an invaluable personal reference for studio drawing.” She further advises that keeping a field journal and note-taking alongside the sketches will be useful and ameliorate the birdwatching experience as well as being a good visual memory refresher when you’re back in the studio.
In no time, you will realize the significance of developing your fast-sketching abilities if you’re drawing a live bird. To help with increasing your drawing agility, you can practice gestural drawings which focus primarily on capturing form and movement as opposed to extensive detail. Additionally, in the sketching process, you can use versatile tools such as water-soluble pencil and ink pen followed by a light wash which is created by using a wet brush over the strokes to slightly dissolve them. Ranjit Sagoo notes that in his process, he “redoes the outline in white pastel so [he] can see [it clearly] as [he] begins to add colour. [He] starts with background colours, blocking in long areas with soft pastel blending these to create smooth background tones. [He] then starts to add layers in pastel pencil building from darker to lighter which adds the depth and dimension to the piece".”

“Intent” (In progress 4) //Pastel on Paper// by 4th Edition Finalist, Ranjit Sagoo
4. Understand proportions
Balo suggests to “acquire the habit of mentally surrounding the object of study with a rectangular “glass” container or cage, containing the body size limits and aligned with the relevant body axes.” This can help to make it easier for you to stay in proportion. The proportions of body parts depend on the bird species which is why it’s important to research the anatomy of your bird species of interest in depth.

“Intent” (In progress 6) //Pastel on Paper// by 4th Edition Finalist, Ranjit Sagoo
5. DRAWING THE BIRD
To draw the head of a bird, you can break down the anatomy into basic shapes such as an oval which forms the basis of the skull shape. The key is not to focus on or incorporate the feather layer just yet. Ensure sure that you have a loose, slightly tilted grip on the pencil for best results. In relation to the body that you will be drawing next, you can make it a 1/3 smaller than the size of the body. Also, the head must be symmetrical.
For the body, you’ll be drawing another oval followed by two curved lines to join the two ovals which will basically be the neck. At the rear of the bird is where you’ll draw a triangle for the tail. Think more isosceles than the other types because the top would be narrow and the base would be a little wider. The triangle can be around the same length as the oval for the bird’s body. You can add vertical lines on the tail for details that look like feathers. Draw another triangle for the bird’s beak. This can vary in length according to species. The lines of the beak shouldn’t be straight but rather, a little curved. The wing will also be a triangular form that is also slightly curved and on the side of the body facing you. On average, it can take up a 1/3 to a 1/2 of the bird’s body. You also have to consider the motion of the bird in relation to the environment. For example, is the bird perched or in flight because the placement and angle of the wings will then vary a little and you would be able to see the wing on the other side more clearly when the bird is in flight as compared to when it is at rest. The same goes for the bird’s feet because if it is perched on a tree, you would need to draw the feet curving around the branch as opposed to on another surface where it may be straight and flat.
We hope you have found this article helpful and enjoyed our drawing tips. If so, please tag us in any drawings of birds that you create! Thank you for reading.